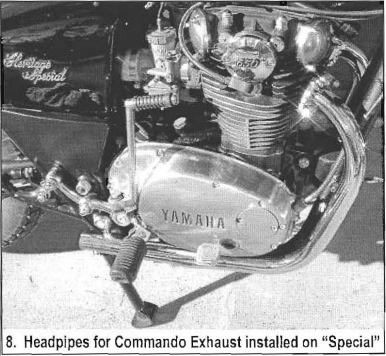
This street exhaust system ( 07-0747 ) is a complete replica of the beloved Norton Commando system, made specifically for the XS650. The single thick-wall headpipes are matched perfectly with mufflers that are fitted with the OEM-type internals for that sweet, unrivaled sound. The all-inclusive kit supplies you with a pair of finned exhaust flanges, gaskets, and complete mounting brackets/hardware to get the job done.
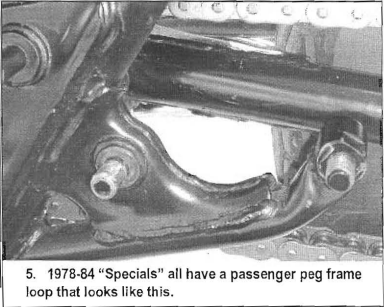
Fitment: 1978 – 1984 Yamaha XS650 “Specials”
Installation Instructions
- Do not install this system without having your bike tuned and running properly in its existing configuration. Suggested jetting is as follows:
A) If you have a 1980 – 1984 model with the stock Mikuni BS34 CV carbs, we recommend that you rejet to a richer mixture before installing and running this system, as the BS34 is usually set very lean.
Main Jet: #142.5 – #147.5 range
Pilot Jet: #45.0
Air Jet: #127.5
Idle Mixture Screw: 2 1/2 – 3 turns out from the bottom
Once properly jetted, synchronize the carbs.
B) If you have a 1978 – 1979 model with the stock Mikuni 8S38 CV carbs, we recommend that you rejet to a richer mixture before installing & running this system. A main jet of #140.0 or higher is required.
NOTE : These are approximate jet sizes. Every motorcycle differs and your bike will be further affected by any changes to the air filters. Final jetting should be set by someone who knows how to do a spark plug reading and knows how to tune. The normal end result should be a good running bike that pulls cleanly to redline when running through the gears.
2. Remove the old exhaust system, as well as the old gaskets from the cylinder head ports. Remove the rider footrests and passenger pegs.
3. Unpack the new 07-0747 exhaust system. Examine, wax, and polish the chrome headpipes and mufflers.

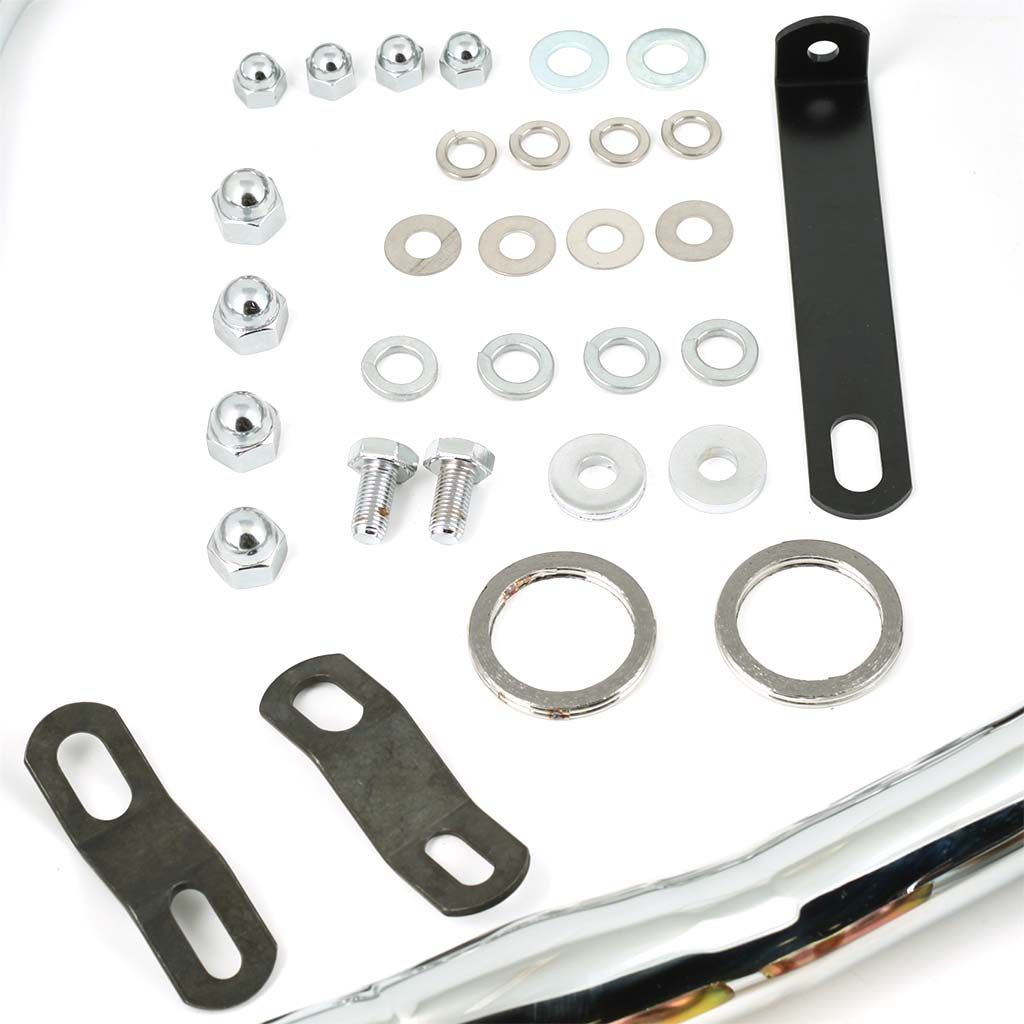
6. A hardware kit is included with your new exhaust system and is packed with related parts in sequence (reference sheet below).
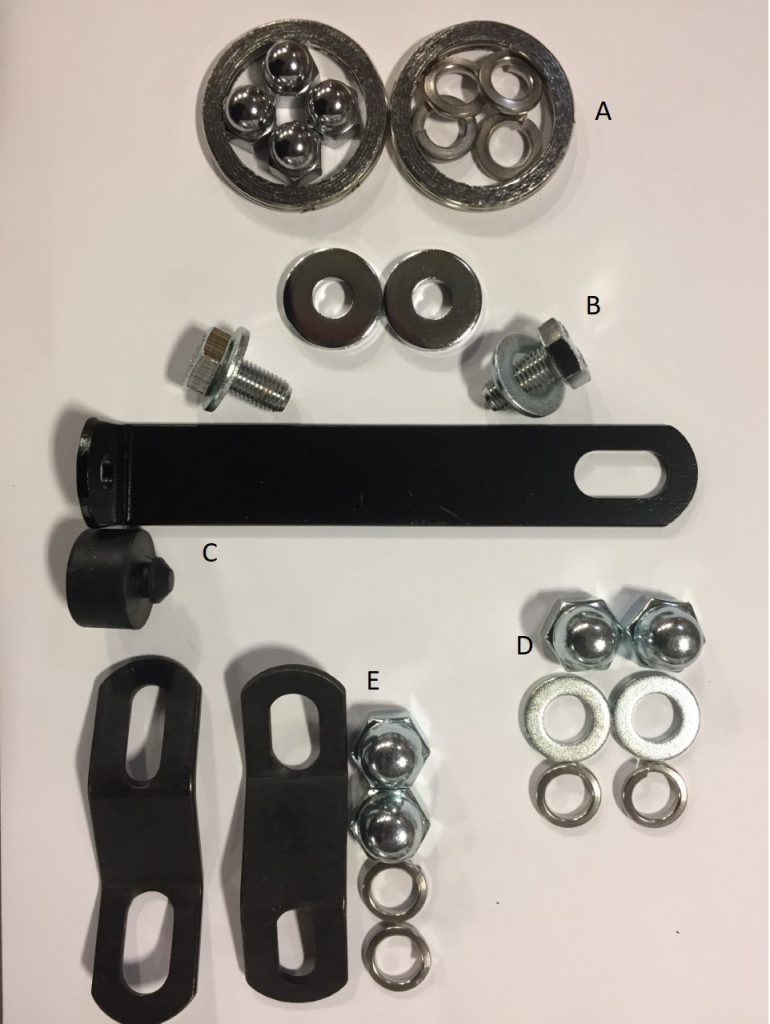


16. Install the flat washer, lock washer, and crown nut (HDW Ref. D) onto the remaining bare frame stud on the right side mount. This is solely for appearance purposes.
17. Re-install the rider footrests and check the rear brake adjustment, as well as the travel of the brake pedal to be sure it does not hit the headpipe.
18. Wipe down the entire exhaust system and remove all dirt, oil, and fingerprints from it before starting or these markings will embed in the chrome plating once the exhaust becomes hot.
19. Start the bike and let it warm up for a few minutes. Check for exhaust leaks, adjust the idle speed, shut off the engine and retighten all the system mounting fasteners.
20. Take it for a test drive. Adjust jetting and idle as needed and retighten all fasteners, again.
You have now installed your Commando Type Exhaust System.
For tech support, contact us at customerservice@mikesxs.net