

As explained in your owner’s workshop manual, the Yamaha XS650 twins are fitted with a 12-volt electrical system, powered by an alternator. Current from the alternator is passed through the rectifier, where it is converted from alternating current (AC) to direct current (DC). The rectified current is then routed to the voltage regulator, which matches the generator output to the varying requirements of the electrical system.
If you’re reading this, you’re probably having some charging issues.
No need to fret. By following this simple step-by-step troubleshooting guide, you will be able to determine if any components of your XS Charge PMA charging system need to be replaced.
Testing Your XS Charge PMA
To execute an accurate voltage test, get your XS650 warmed up and idling. Your voltage readings should be in the neighborhood of 12.9v – 14.5v.
Inspect all wired connections of your charging system to confirm connectivity.
Testing The Alternator Stator & Flywheel
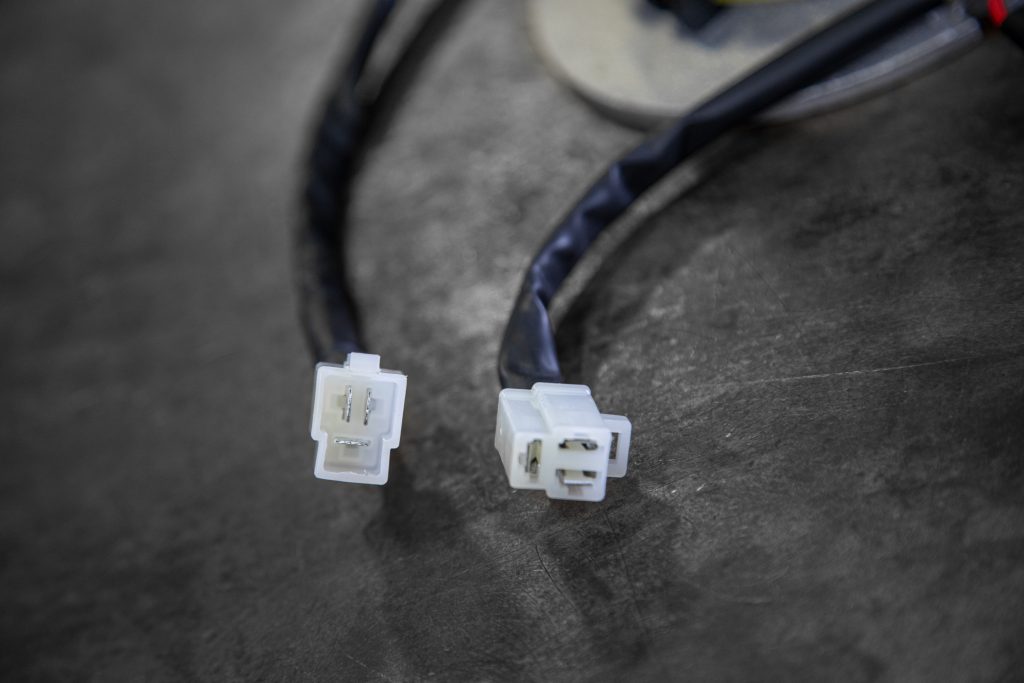
Disconnect the stator and the regulator/rectifier and inspect for any visible damage between the connectors (heat, corrosion, etc.).
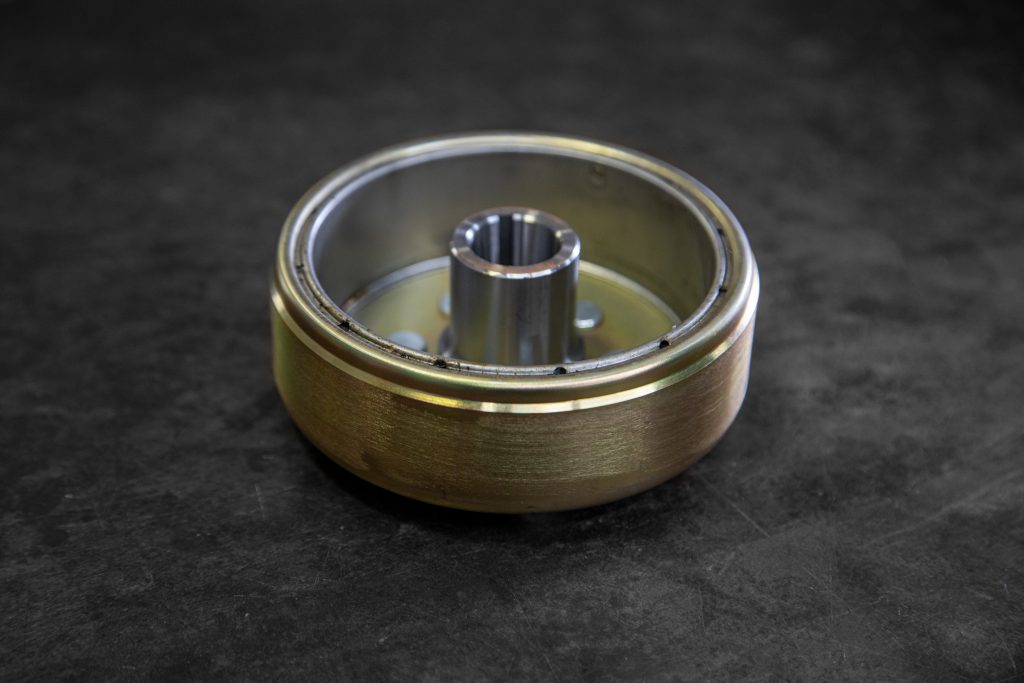
Remove the flywheel and inspect for any damage (pictured below).
Visually inspect the stator for any noticeable damage (pictured below). Check for any nearby oil leaks that would cause the unit to fail.

Remove the stator and test it with your voltmeter on its lowest ohms setting. Test it between each leg (shown below).
Your readings should be between 0.7 – 1.0 ohms.
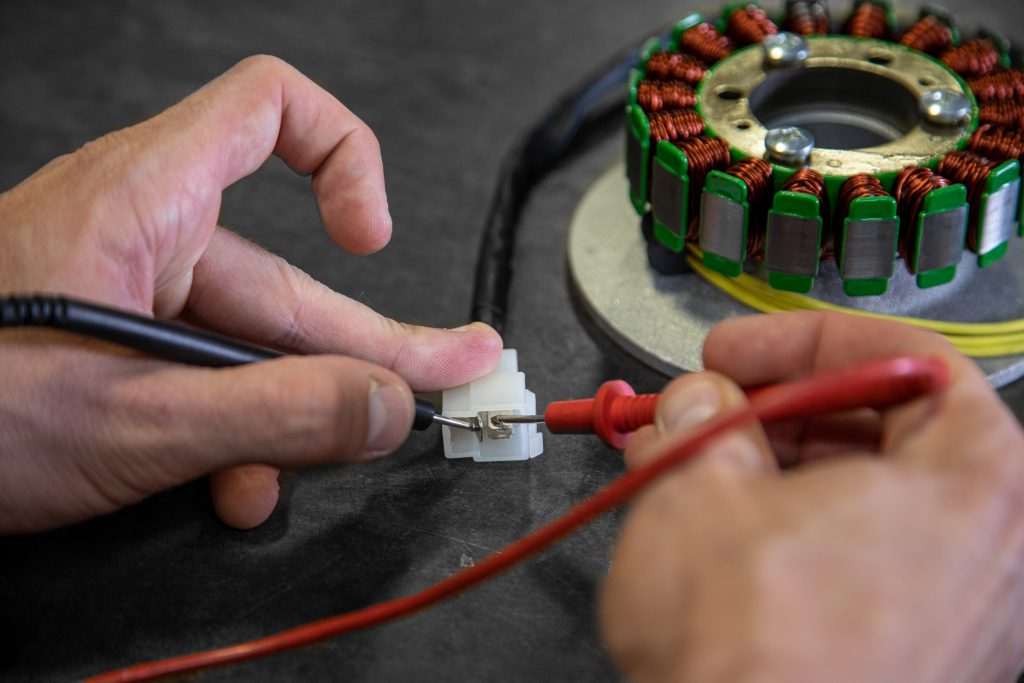
Next, test the stator coils by setting your voltmeter to the AC voltage setting. Note: the stator produces AC voltage. The rectifier/regulator is the component that changes the AC voltage to DC voltage and then regulates to charge the battery if required. You can read AC voltage directly from the 3 yellow wires.
Your unloaded reading should be between 10 – 20 volts (AC). This reading would be at 1000 – 1500 rpm.
Testing The Regulator/Rectifier
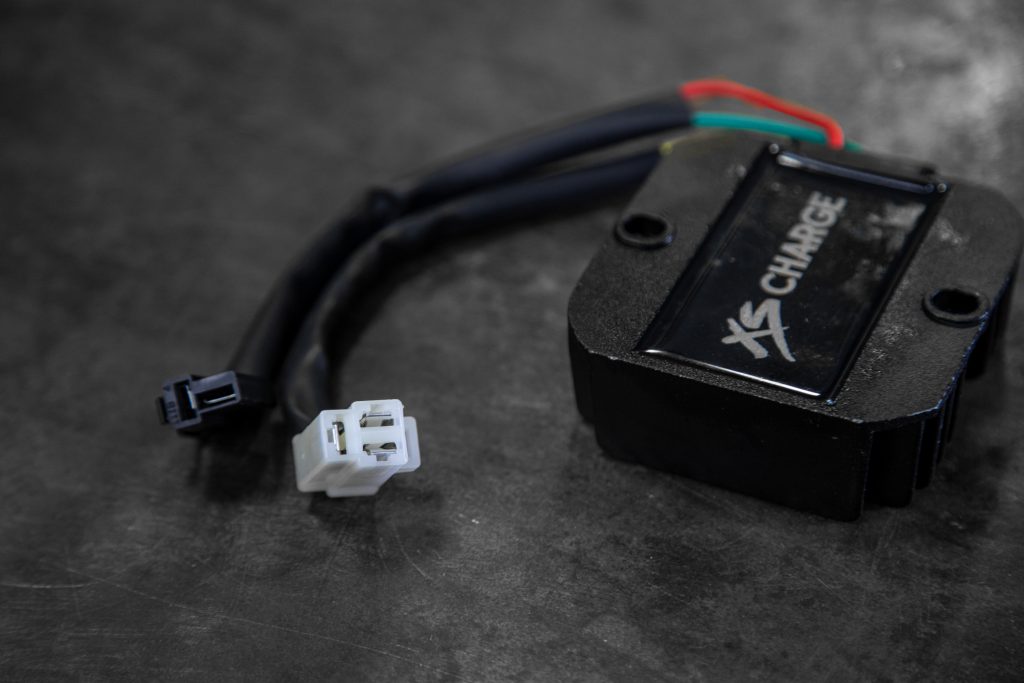
Remove the regulator/rectifier and inspect it for any visible damage (pictured below).

Now, with your voltmeter on the “Diode” setting, test the regulator/rectifier as follows:
– Red lead (+) to the red wire on the regulator/rectifier.
– Black lead to test each individual terminal of the 3-wired yellow plug.
There should be no change in your readings.
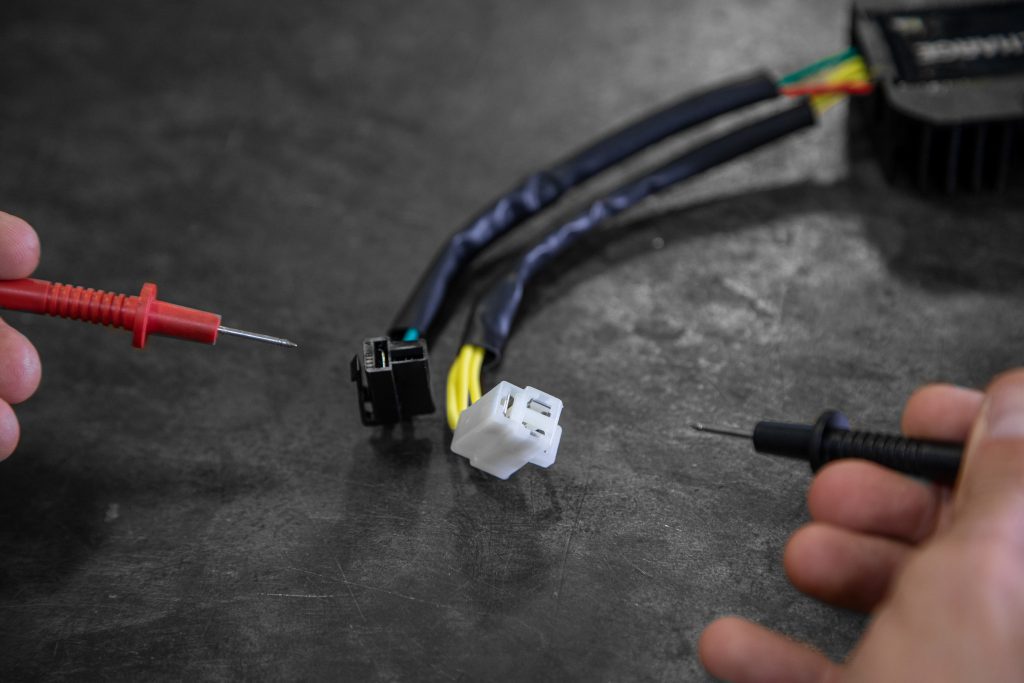
Now, switch the red lead to the green plug (-) on the regulator/rectifier. Repeat the test as before, testing each terminal of the 3-wired yellow plug.
All 3 readings should be similar. They do NOT have to be exact.
You have now successfully tested your XS Charge PMA Charging System.
For further assistance, please contact us at customerservice@mikesxs.net
